A lush, green lawn is the dream of many homeowners. However, achieving this dream requires more than just laying down sod and hoping for the best. Proper sod installation is crucial to ensure a thriving lawn. It’s not just about placing the sod on the ground; it’s about preparing the soil, choosing the right type of grass, and caring for it properly after installation. Avoiding common mistakes can distinguish between a thriving, beautiful lawn and a patchy, unhealthy one. In this article, we’ll explore the top 5 sod installation mistakes to avoid for a flourishing lawn.
Mistake 1: Improper Preparation
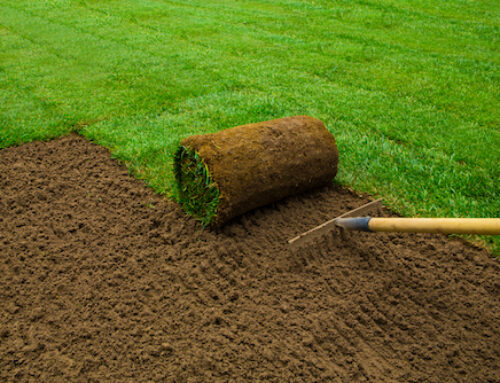
One of the most common mistakes made during sod installation is improper preparation. The success of your lawn dramatically depends on the preparation of the ground before the sod is laid. This includes:
- Removing old grass and weeds can interfere with the new sod’s ability to root correctly in the soil.
- Testing and amending the soil: The pH and nutrient levels of the soil should be optimal for the type of grass you’re installing.
- Leveling the ground: This ensures that the sod lays flat and has complete contact with the soil.
By taking the time to properly prepare the ground, you can provide a healthy environment for your sod to thrive and establish a flourishing lawn.
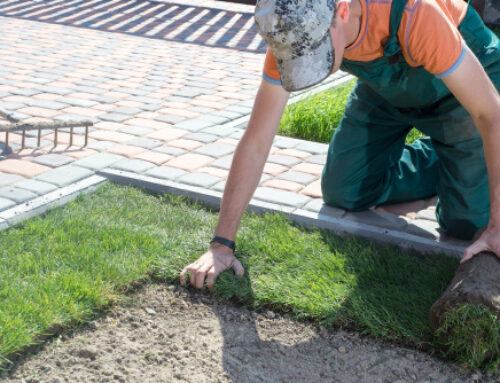
Mistake 2: Leaving Gaps
Another common mistake in sod installation is leaving gaps between the sod pieces. Gaps can lead to an uneven lawn and provide space for weeds to grow. They also expose the soil to sunlight, drying it out and preventing the sod from rooting properly.
To avoid this:
- Lay the sod pieces edge-to-edge: Make no overlaps or gaps.
- Stagger the rows: Like bricks in a wall, this ensures that the seams don’t line up, reducing the chance of gaps.
By paying attention to these details, you can provide a smooth, even lawn with no gaps.
Mistake 3: Not Flattening the Sod
Flattening the sod is a crucial step that is often overlooked. If the sod is not flattened correctly, it can lead to an uneven lawn with bumps and dips. This affects not only your lawn’s appearance but also its usability and maintenance.
To ensure a smooth lawn:
- Use a lawn roller: After laying the sod, go over it with a lawn roller to ensure it’s flat and has good contact with the soil.
- Check for air pockets: These can cause the sod to dry and die. If you find any, flatten them out.
By properly flattening the sod, you can ensure a smooth, even lawn that’s pleasing to the eye and easy to maintain.
Mistake 4: Watering Too Much or Not Enough
Watering is a critical aspect of sod installation. Both overwatering and underwatering can lead to problems. Overwatering can cause the roots to become waterlogged and oxygen-starved while underwatering can prevent the sod from establishing a strong root system.
To ensure proper watering:
- Water immediately after installation: This helps the sod to establish contact with the soil.
- Keep the sod moist but not waterlogged: The top 1 inch of soil should be moist.
- Adjust watering based on weather: You may need to water more in hot, dry weather and less in cool, wet weather.
Watering correctly, you can help your sod establish a robust root system and create a flourishing lawn.
Mistake 5: Mowing Too Soon
Mowing too soon after sod installation is a common mistake that can damage the new grass. The sod needs time to establish its roots in the soil before it can withstand mowing. If you mow too soon, you can pull up the sod or cause it to dry out.
To avoid this:
- Wait until the sod is rooted: This typically takes 2-3 weeks. You can test this by gently tugging on the sod. If it resists, it’s ready to mow.
- Don’t cut too short: For the first mow, only remove about a third of the grass blade.
By waiting to mow, you can ensure your sod is well-established and ready to thrive, leading to a flourishing lawn.
Tips for Successful Sod Installation
Aside from avoiding common mistakes, there are several proactive steps you can take to ensure a successful sod installation:
- Choose the Right Sod: Different types of grass have different needs and are suited to different climates. Choose a variety of sod well-suited to your local climate and soil conditions.
- Kill Old Grass: Before laying new sod, removing or killing any existing grass is crucial to prevent it from competing with the new sod.
- Don’t Overlap Pieces of Sod: When laying the sod, make sure the pieces are edge-to-edge without any overlaps. Overlapping can cause bumps and uneven growth.
- Water Properly: As mentioned earlier, proper watering is crucial. The sod should be kept moist but not waterlogged.
- Wait to Mow: Don’t mow the sod until it has fully rooted in the soil.
Following these tips can increase your chances of a successful sod installation and a beautiful, lush lawn.
Conclusion
In conclusion, a flourishing lawn is not just about laying sod on the ground. It requires careful preparation, proper installation, and attentive care. The common mistakes we discussed – improper preparation, leaving gaps, not flattening the sod, watering too much or not enough, and mowing too soon – can all hinder the success of your lawn.
However, by being aware of these potential pitfalls and knowing how to avoid them, you can significantly increase your chances of a successful sod installation. Prepare the ground thoroughly, lay the sod carefully without gaps, flatten it properly, water it just right, and wait for it to root before mowing.
Moreover, following the additional tips we provided – choosing the right sod, killing old grass, not overlapping pieces of sod, watering properly, and waiting to mow – can further enhance the success of your lawn.
By avoiding these common mistakes and following these tips, you can transform your yard into a lush, green, flourishing lawn that you can be proud of.